Setup
Table of Contents
Introduction
This documentation is to help users with DIY steps to using GenesisX in order to setup, create, serve, build and delete applications, component libraries and storybooks.
GenesisX Developer Types
GenesisX developers can be categorized mainly in two groups
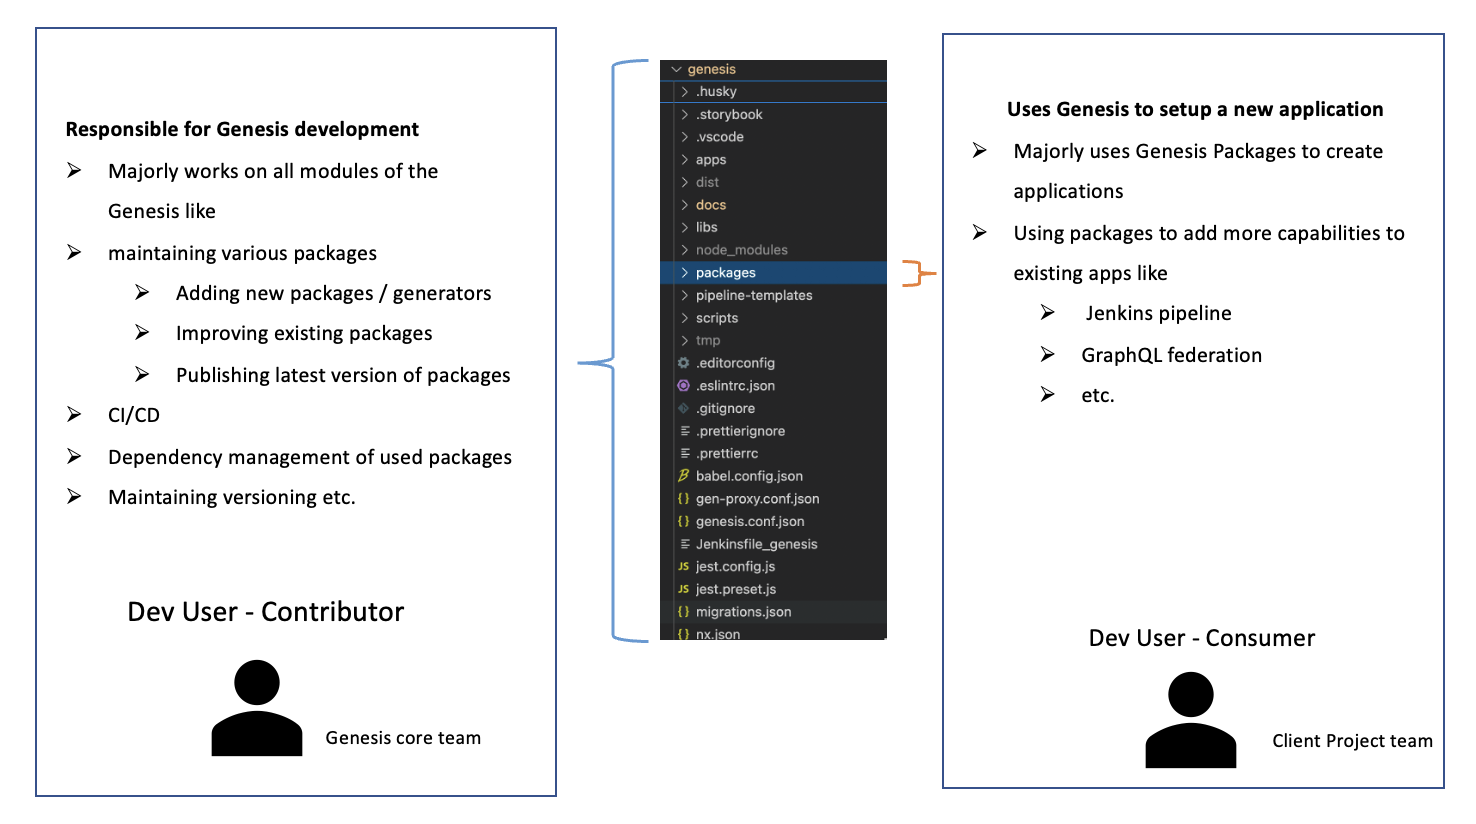
Consumer of GenesisX
In case you want to use GenesisX to setup a new project or want to use its packages, please refer the below section.
You do not need access to GenesisX codebase for this.
Prerequisites
- Make sure you are on node version 18
- Its recommended to use Yarn for dependency management
- There are 2 ways to get started with a clean repository -- Forking the project OR -- Clone without Git History
Setup
For setting up workspace and using the packages to create Apps
NOTE: Use the stable version of a package only, and do not go for the latest one, refer packages page to find out the LTS version.
Create a new workspace
For a consumer of GenesisX, the journey will start with creating a fresh workspace with basic packages installed. Please follow the below steps to setup the workspace.
Make sure you are on node 18
nvm use 18Run the CLI from a blank directory
npx @genesisx/create-workspaceORnpx @genesisx/create-workspace@<version>(versions)
Provide the requested parameters:
- Provide a name to your workspace like demo-workspace
- chose basic JenkinsFile (NOTE: This step might not work however you can add it later as explained below)
- The workspace will be generated
cd demo-workspace
- Optional:
- cleanup existing node packages and lock files
rm -rf node_modules package-lock.json yarn.lock- Install fresh packages
yarn install
- Add required genesisx packages, follow below section
Using GenesisX Packages
Once a new workspace is setup, the next step is to create new apps (microapps/ other packages).
Using GenesisX packages is 3 step process
- Install the package
- Run the package to generate apps/modules
- Serve the generated app
🔎 All of the below steps should be performed from the new created workspace or any existing GenesisX based project.
More details on packages, please refer individual readme :
<GenesisX-source>/packages/<package-name>/README.md
1. Install the package
- Install the package before using it
- All supported packages (generators) names can be found under src/packages folder.
- All packages are hosted in npm under the org @genesisx so the react package will be @genesisx/react
- To install the dependency , from the root of the project run
yarn add <package-name>@<version>(versions) ORyarn add @genesisx/<package>
Some of the packages might not need installation , and can be installed with npx , please refer individual readme for more detail
2. Run the package
- To run the package to create new apps / modules use the generate command
- example
nx generate <package-name>:templated(s) <arguments>
- example
- More details about individual package along with Nx console details / command line arguments can be found in the package readme
3. Serve the app
- To test the newly generated app/module from above package
- use the serve command
nx serve <app-name>
- More details about using individual package along with Nx console details / command line arguments can be found in the package readme
<GenesisX-source>/packages/<package-name>/README.md
Note: Some of the packages are just utilities / functionality enablement, so they might not be served as a endpoint, please refer individual readme for more detail**
You can use non-genesisx (@nx) packages as well, please refer the packages usage see the Packages section.
Examples of some key packages
Below are few examples of using the packages in a GenesisX app.
1. How to create a react app using Nx
In case Nx Console doesn’t work, use the command line to generate command refer the specific packages readme
like refer src/packages/react/README.md for more details
a. Navigate to NX console > Generate > @gensisx/react
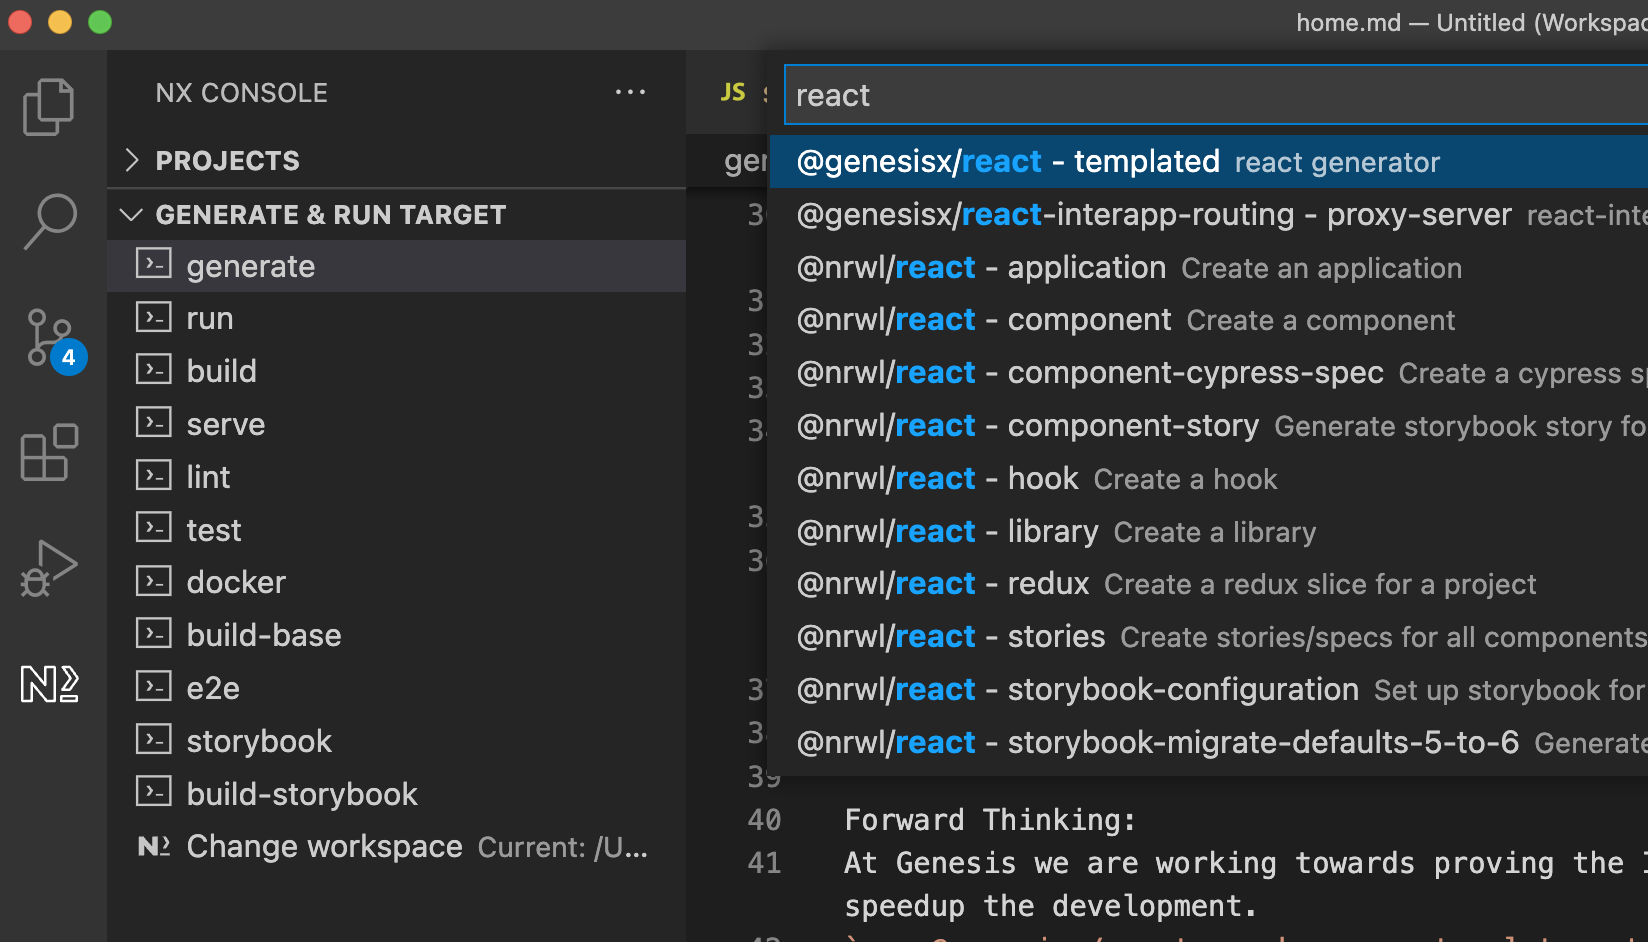
b. Enter the information required as follows;
- name
The name of the application.

-  style
The file extension to be used for style files.

- directory
The directory of the new application.

- *** The rest as displayed on the form in view
through NX console > Generate > @gensisx/react  ****
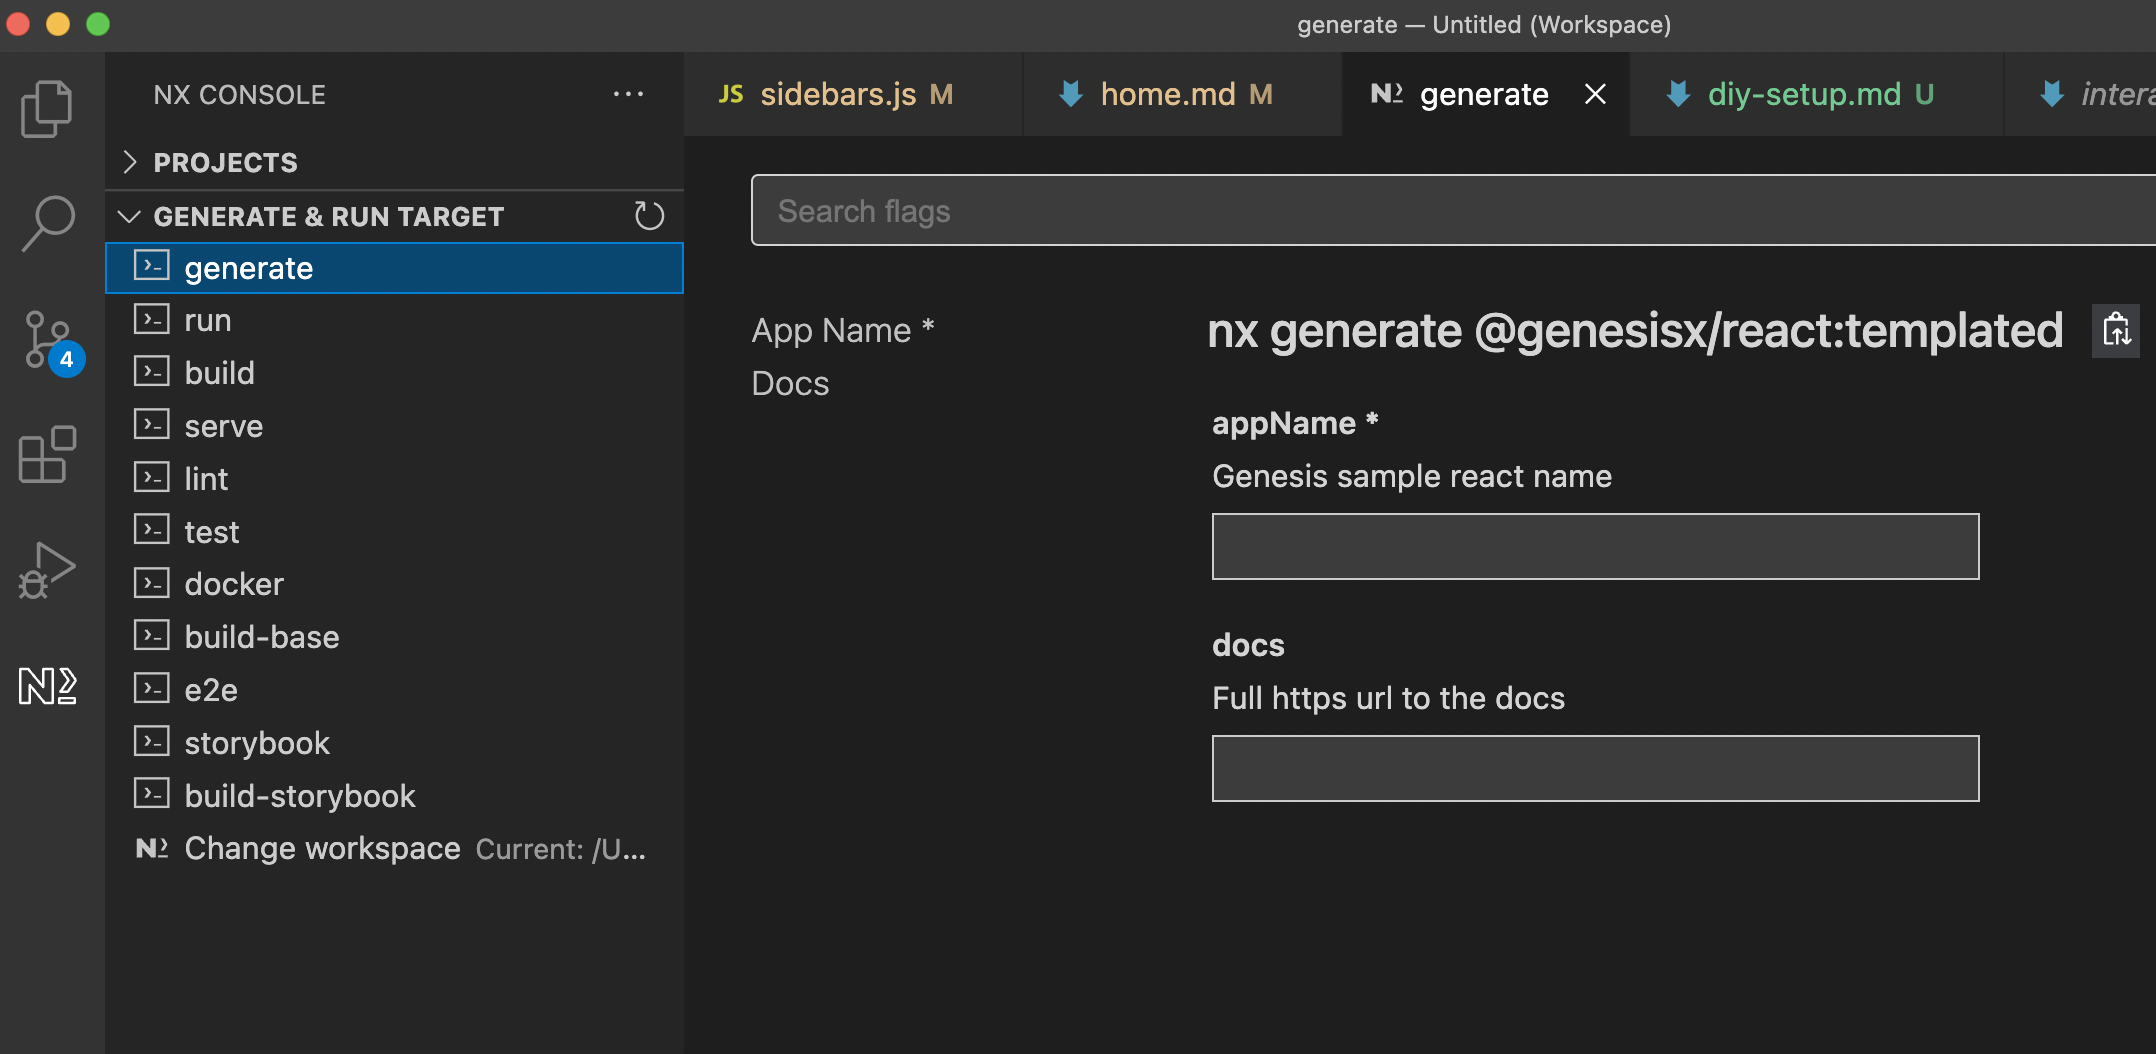 The generator will create all the boiler plate files for the react app
Serve the app (running on localhost)
c. Then serve the react app created through NX console > Serve > <your_project_name>

d. View your app on served host

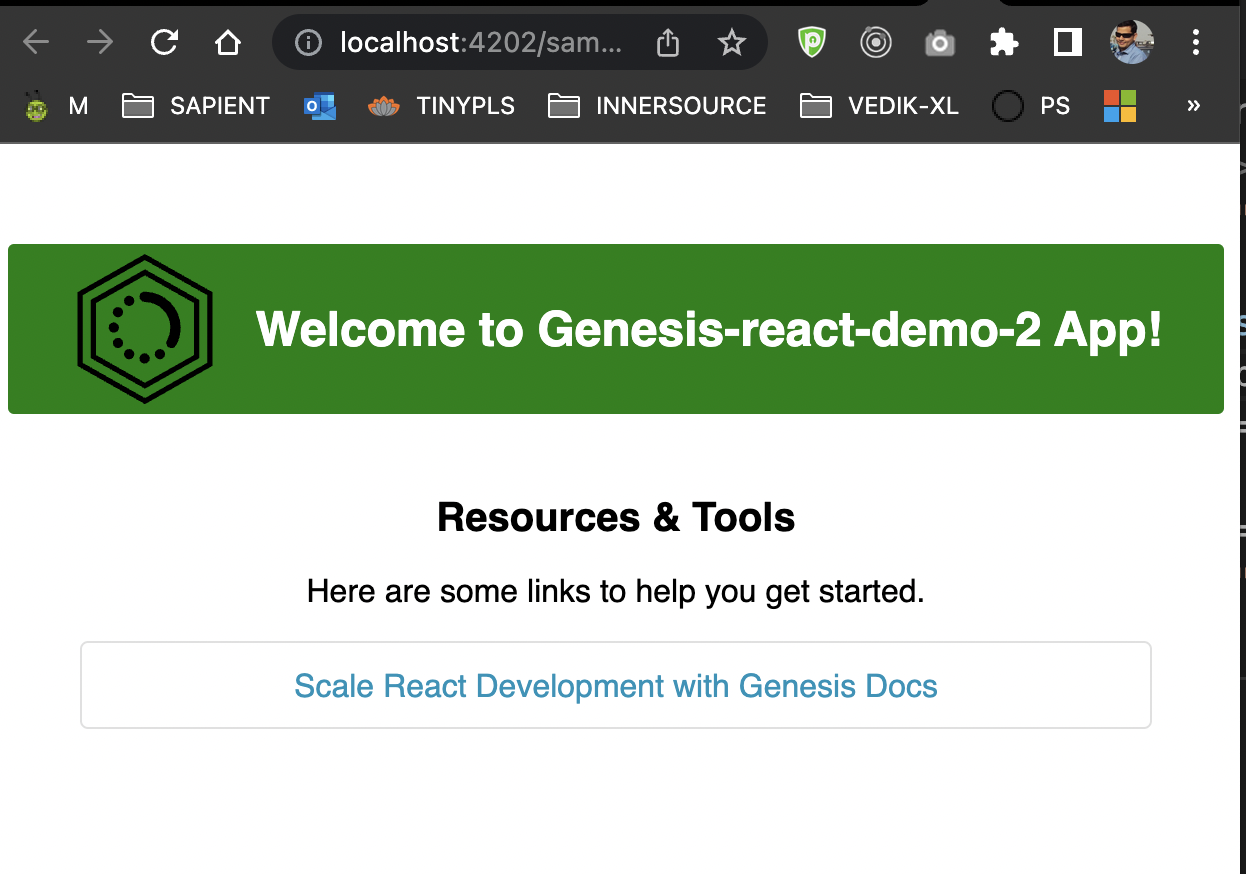
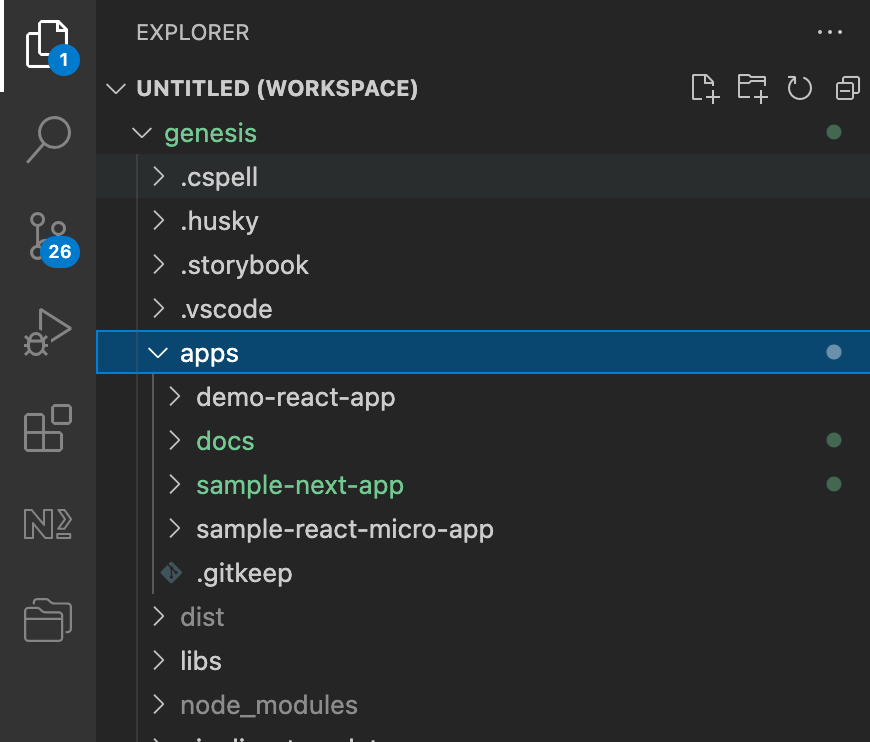
c. Check your created apps
2. How to create a next app using NX
Steps are quite similar to create a new react js based app as above.
a. Navigate to NX console > Generate > @gensisx/next
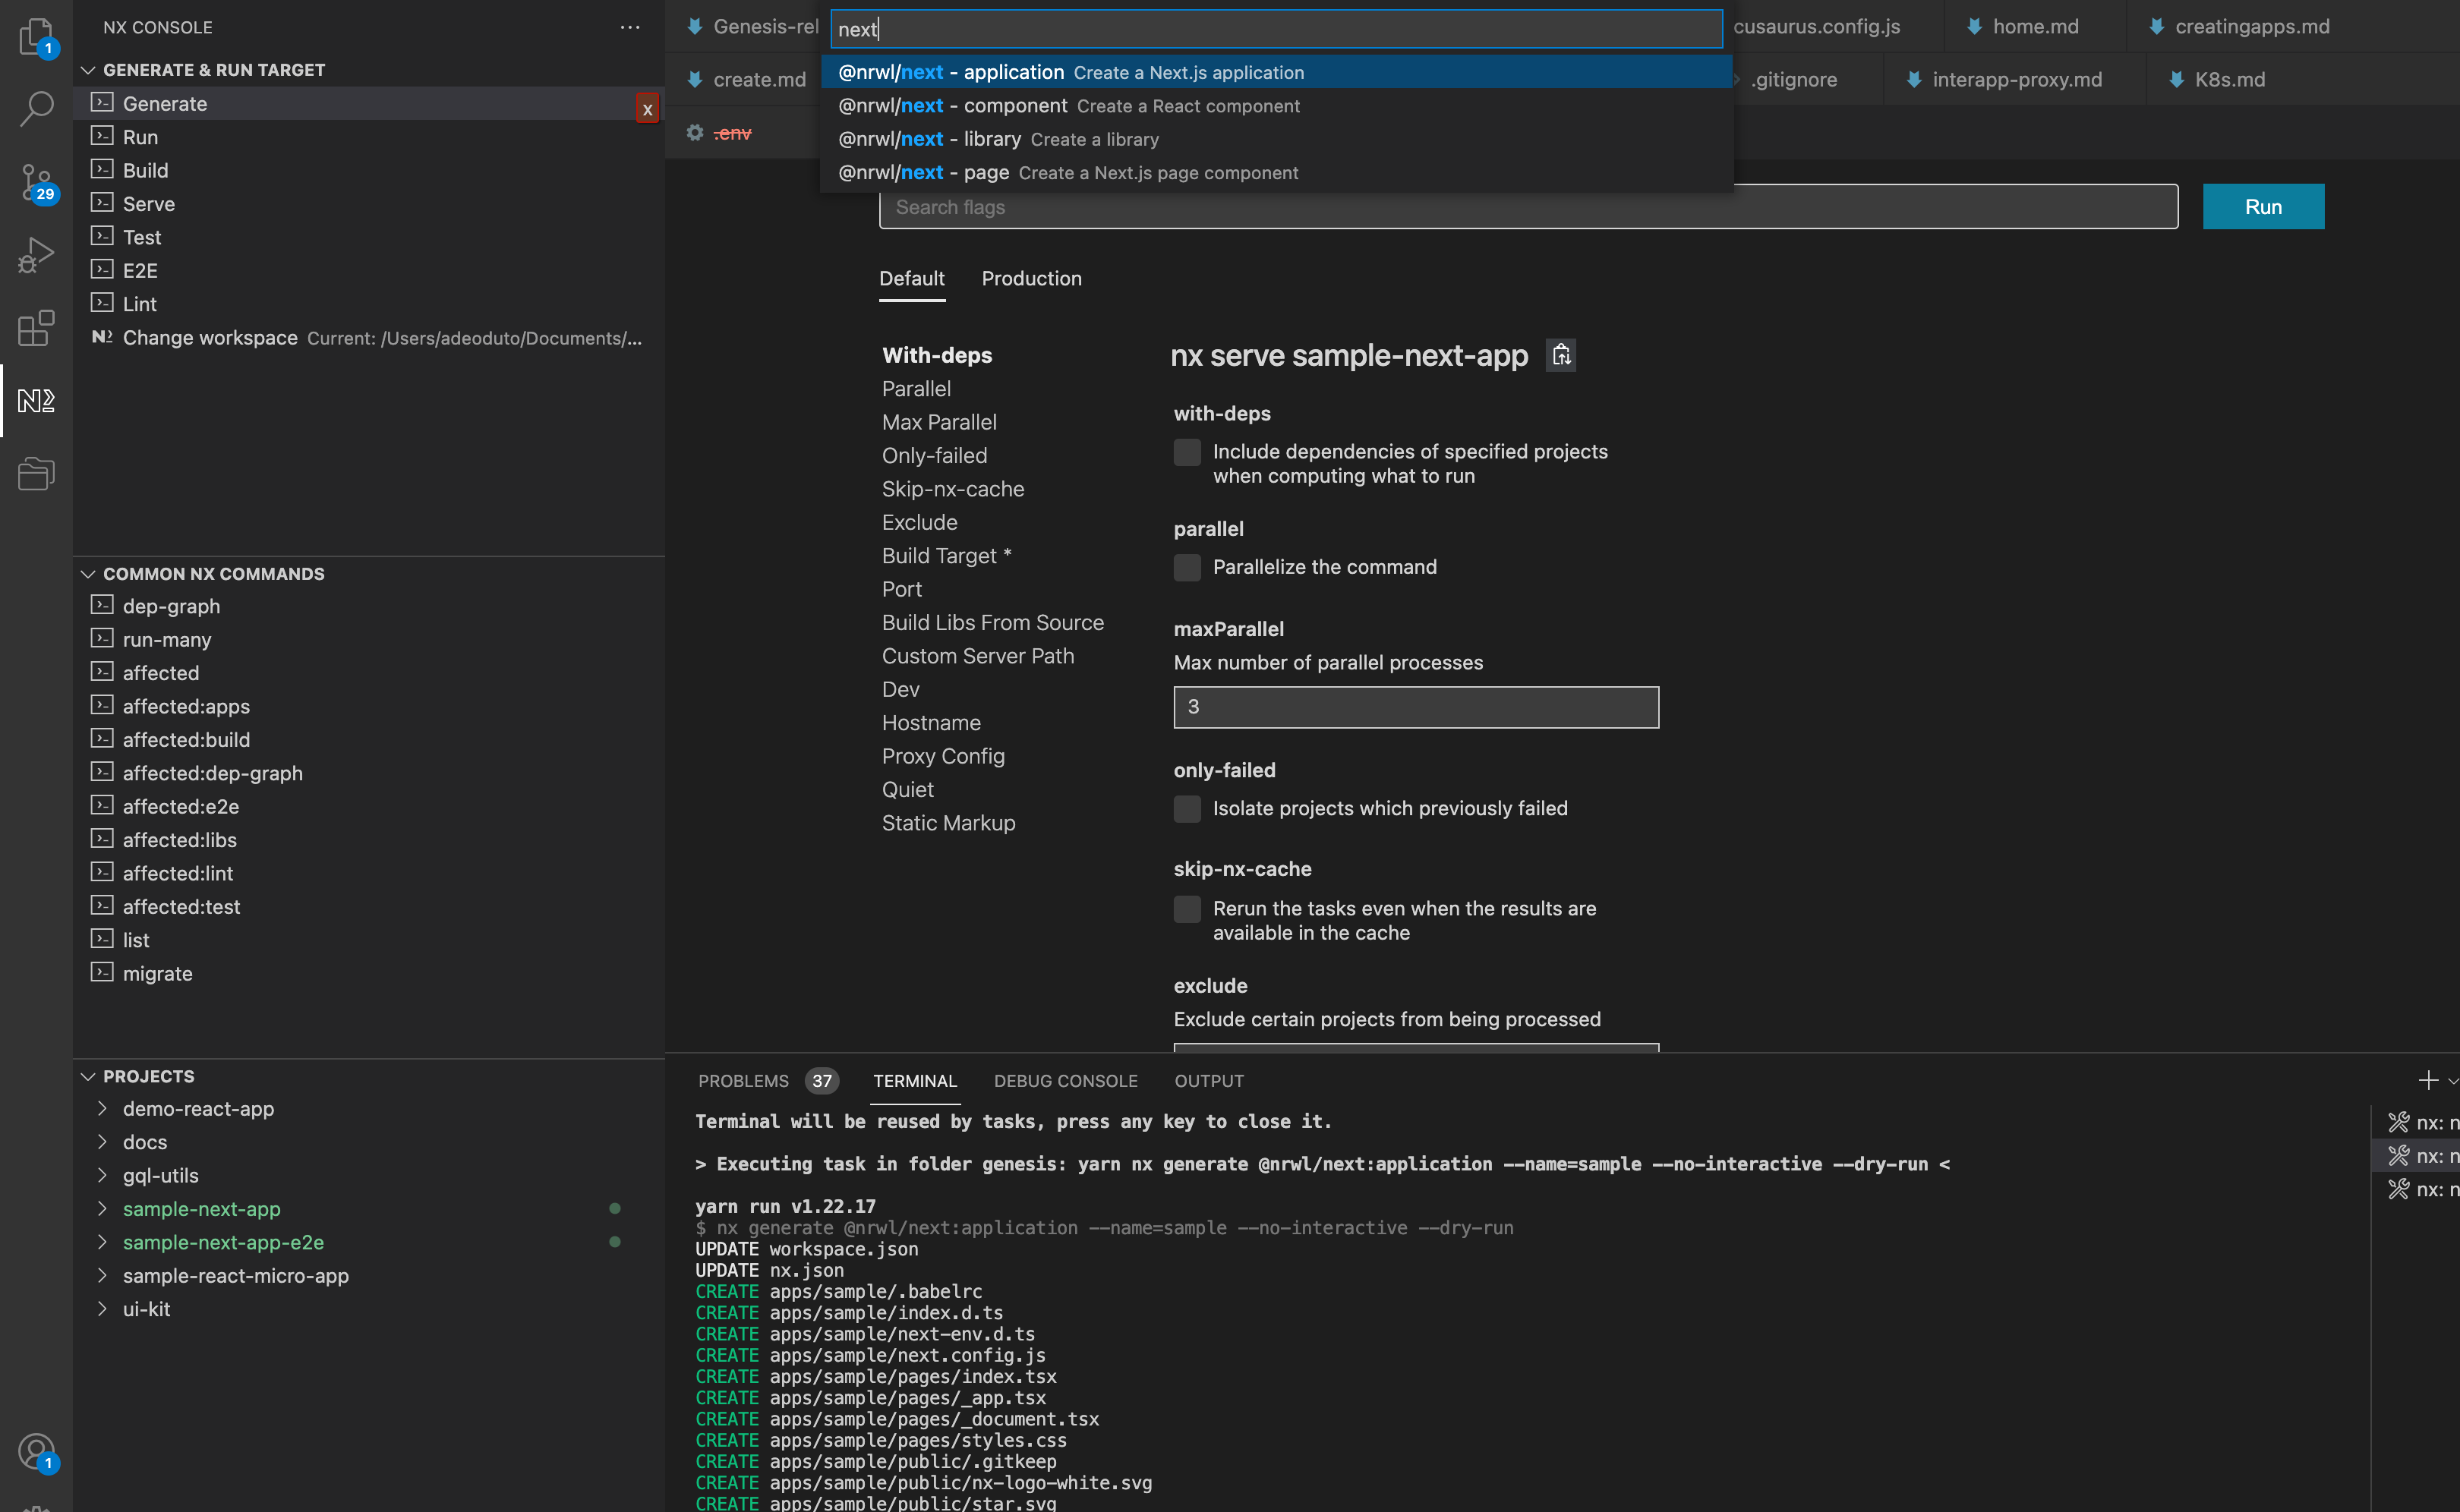
b. Then serve the react app created through NX console > Serve > <your_project_name>
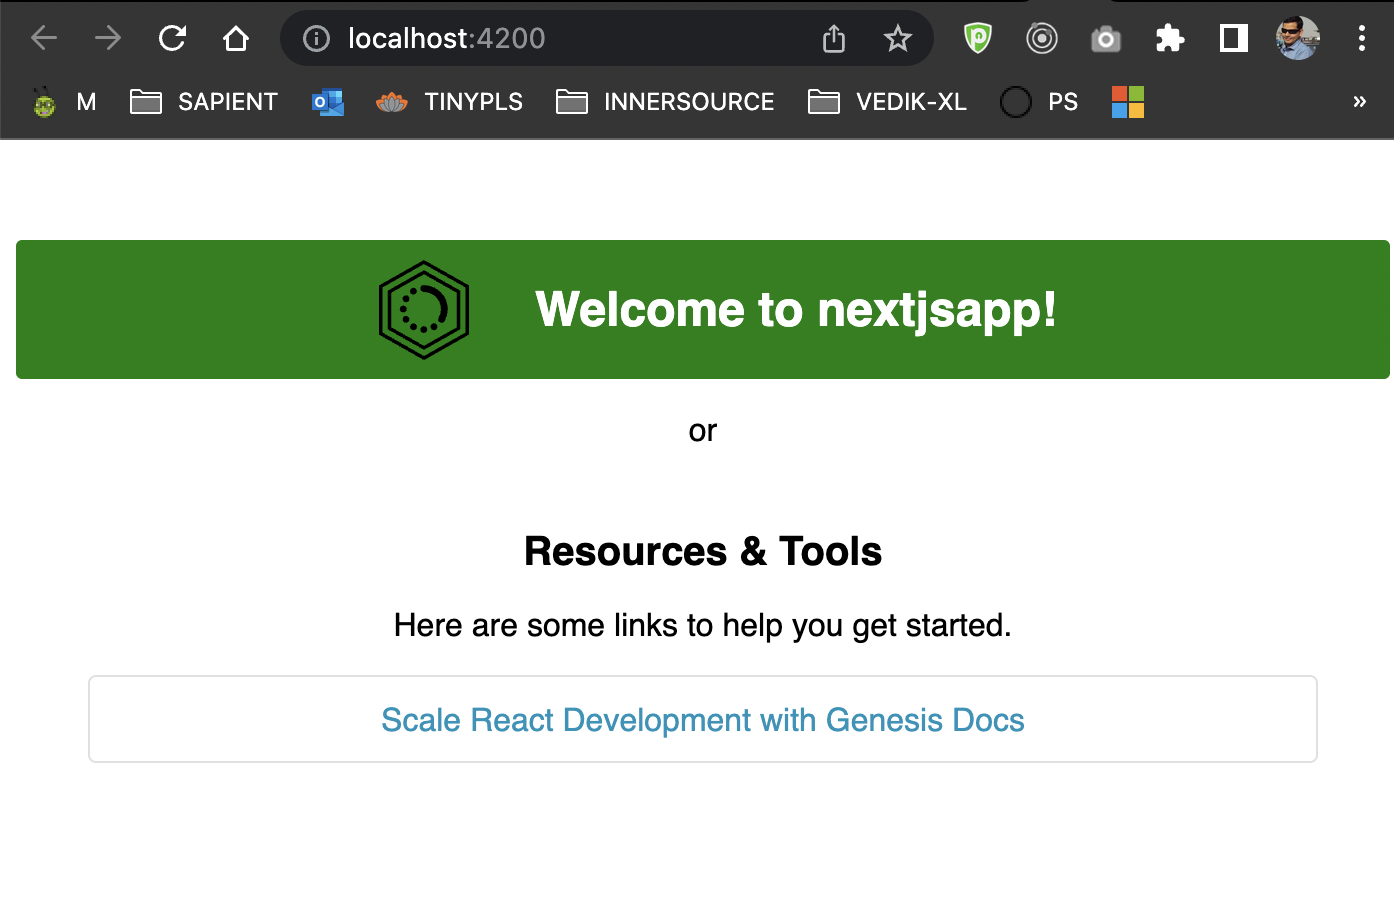
c. Check your created apps

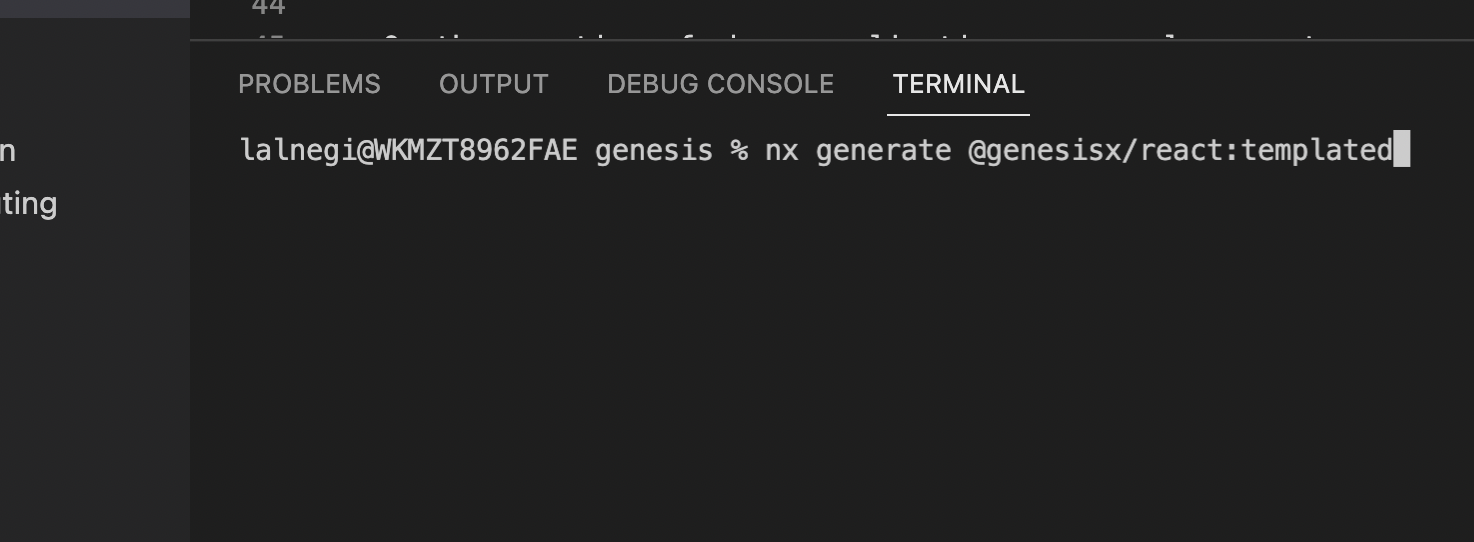
Using command line
In case NX Console doesn't work , please use the command line arguments to generate apps like below
3. How to create react components using NX console
Steps are same as above the react app creation above
c. Check the created component
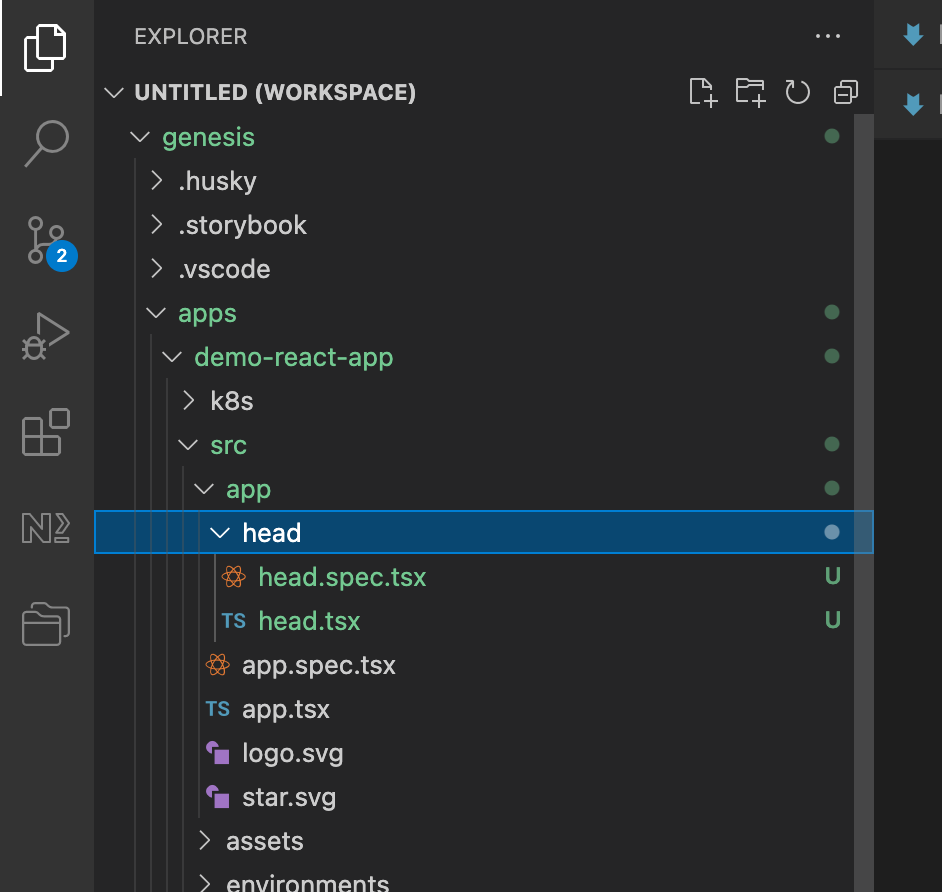
4. How to create react component libraries and access it
Use the react app creation steps from above to setup a component library based on react.
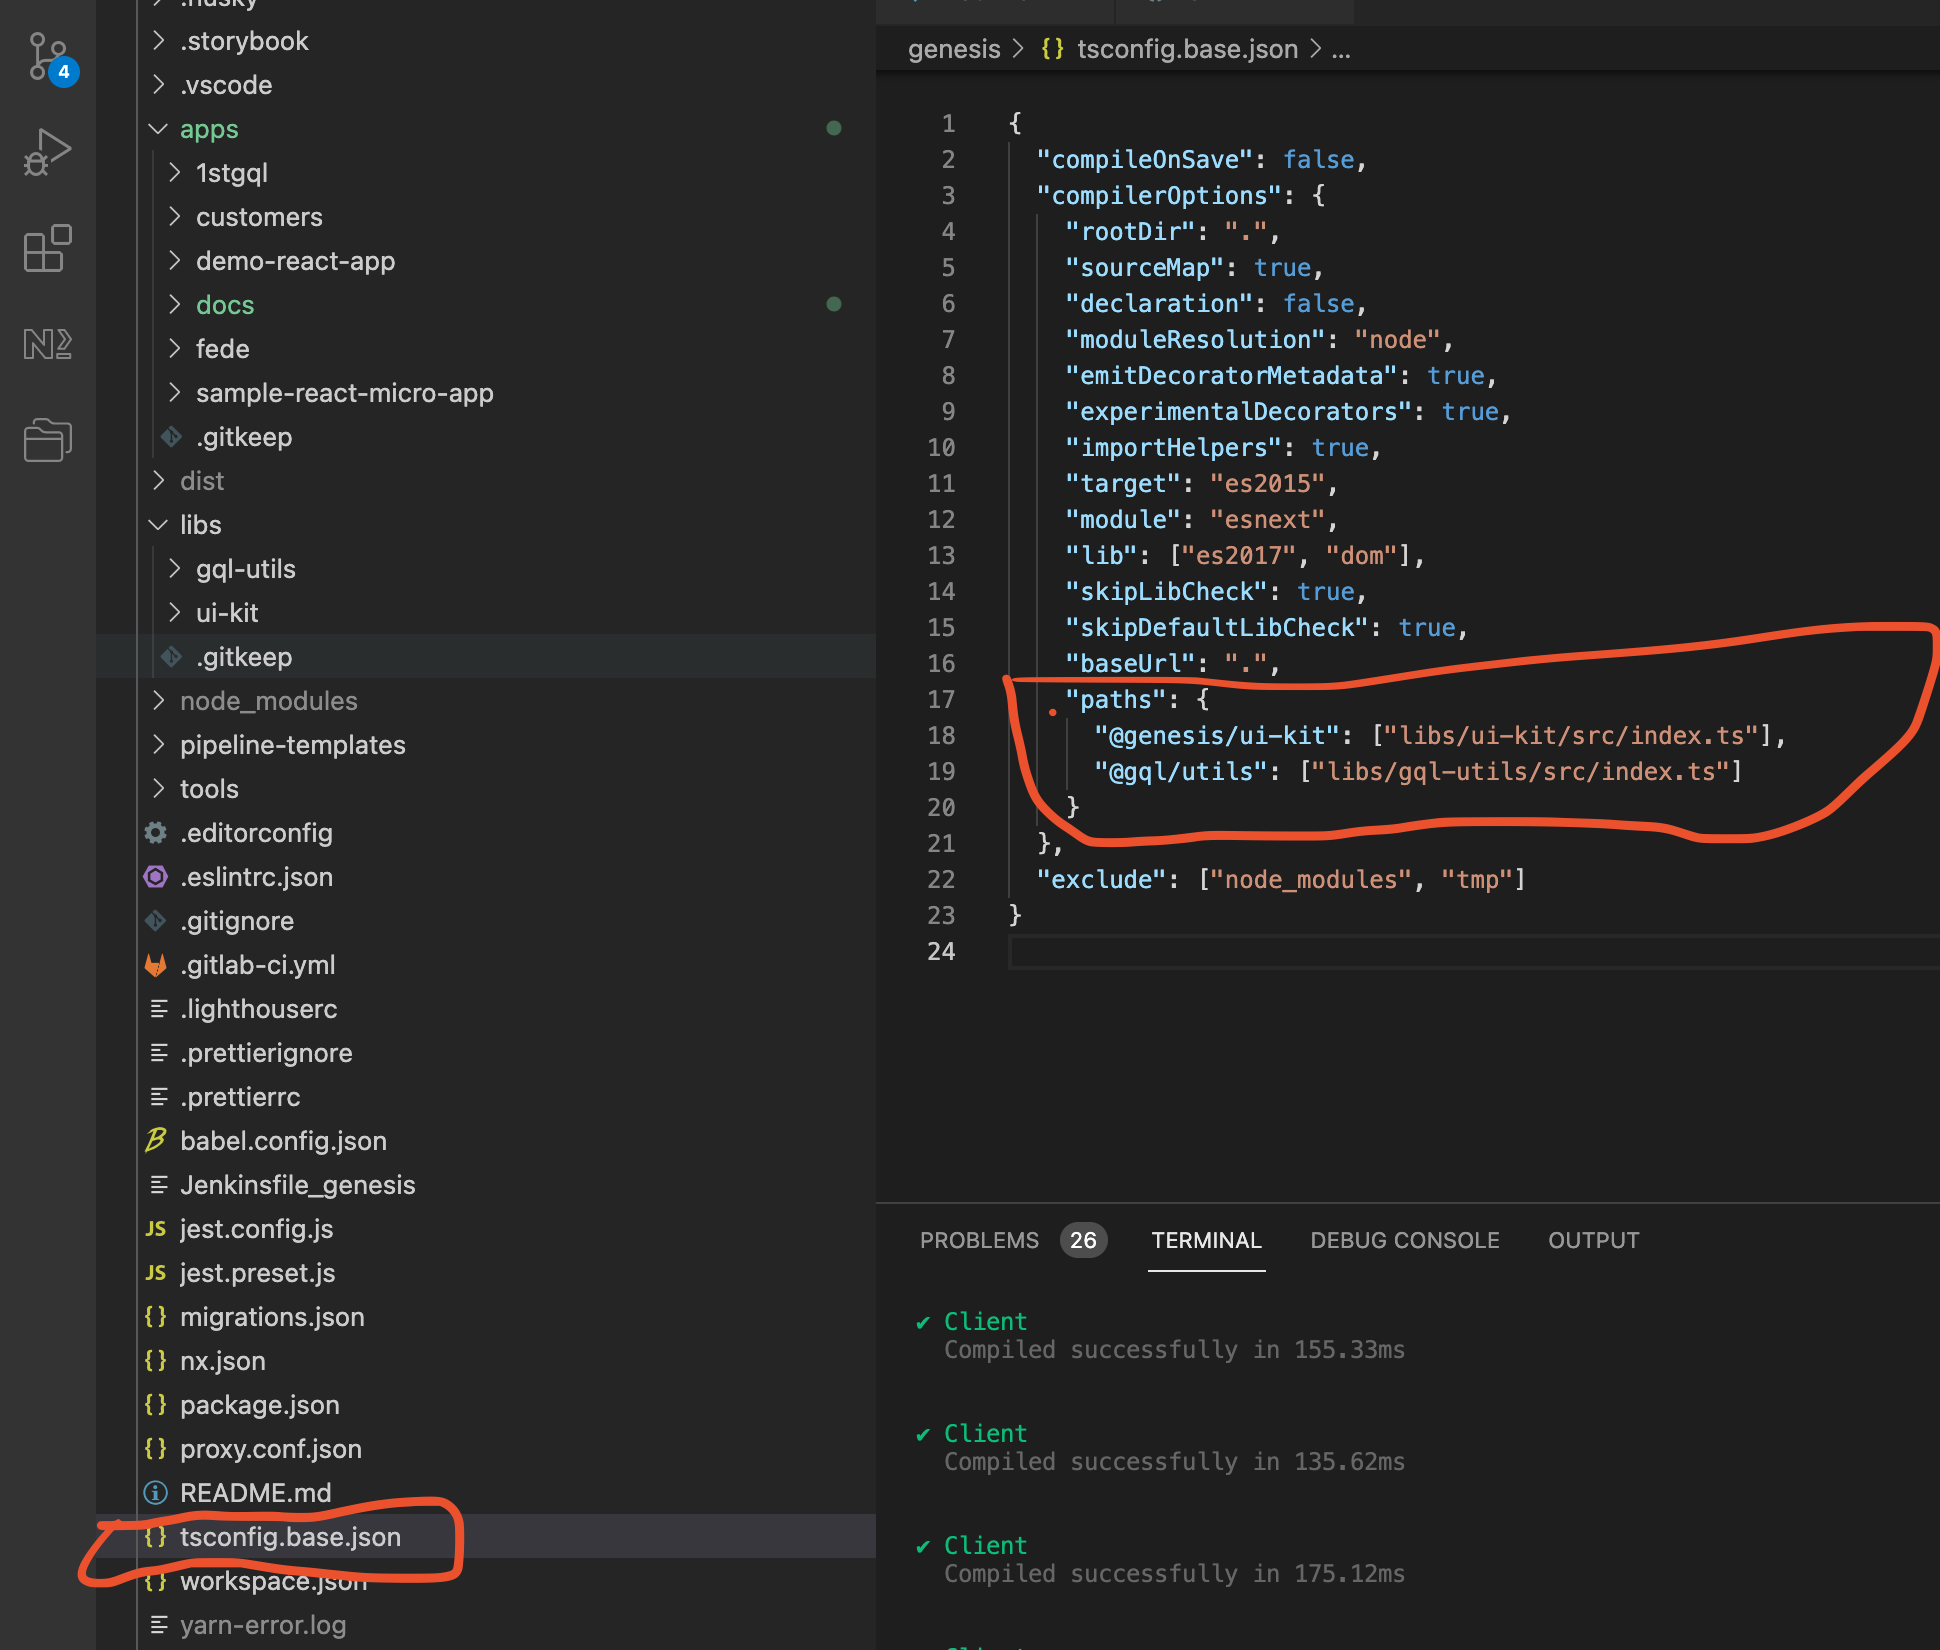
c. To access it for use. You will need to find the path namespace as in the example below called @gensis/ui-kit and @gql/utils in the tsconfig.base.json file
For other packages usage see the Packages section below
Or refer the src/packages/readme.md for the Usage section
5. How to remove apps
a. Navigate to NX console > Generate > @nx/workspace - remove

b. Select the project from the dropdown that you want to delete and click on Run.
c. Check under apps as shown below that the project is removed

d. Your project should be removed from workspace.
Forking the GenesisX project
This is not required for consumer/adopters of GenesisX, but in order to refer any readme / project structure you can fork/clone this repo.
Make sure you have the latest versions installed for Node.js and Yarn
Fork the Repo
https://pscode.lioncloud.net/psinnersource/xt/micro-frontend/genesis.git
- and run
yarn installornpm install - Install the VS Code Nx Console extension.
Clone GenesisX without git history
Clone the Repo suing below setps
git clone --depth 1 -b master https://pscode.lioncloud.net/psinnersource/xt/micro-frontend/genesis.git(Clone GenesisX to your chosen repo)rm -rf genesis/.git*(Remove the git files from GenesisX)cp -R genesis/ YOUR_PROJECT_DIR(Copy the GenesisX files without history to your chosen project )cd YOUR_PROJECT_DIR(Enter your chosen project)yarn(Run Yarn to install dependencies and updates before you start using GenesisX in your project)
Developer of GenesisX
As a developer of GenesisX , you will need access to code and follow prerequisites needs to be followed
Developer Prerequisites
- Make sure you have access to psinnersource
- Make sure you get access to geneisx code repo, please raise the access request by https://pscode.lioncloud.net/psinnersource/xt/micro-frontend/genesis or share your @publicisgroupe.net email id with lalit.negi@publicissapient.com
- Make sure you have the latest versions installed for Node.js and Yarn
Developer Setup
- After getting access Clone the project for GenesisX Contributors) using this URL
git clone https://pscode.lioncloud.net/psinnersource/xt/micro-frontend/genesis.git
- Generate an access token and use it in the place of your password.
- At root of your folder, to make sure all your dependencies are installed.
yarn install
- Follow contributor guidelines (https://genesisx.netlify.app/docs/contributors-guidelines)
- Join GenesisX daily standup and team : contact archana.raina@publicissapient.com
Updating Nx (Obsolete Please ignore this part)
Migrating to the latest Nx version
Regression Testing Checklist after migrating.
- Check if the @gensis-gql-federation generator works by creating Open-api-mock/ service and Federation folder.
- Generating Sample app for React/ Node and Next Js - testing by serving and building it.
- Serving and building Storybook components.
- Build and serve Docs.
- Add k8s and Docker to a sample app by using @gensis-k8Configs generator.
- Creating a sample Library.
Windows User
Note : After Cloning the GenesisX project from PSCloud ,the windows users might face an issue with running commands on VS code Terminal ISSUE :
cannot be loaded because running scripts is disabled on this system
SOLUTION :
Set the Default shell/terminal from Powershell to Git Bash. Open VS Code and Press
CTRL+Shift+P / ⇧⌘Pand search for Terminal Select Default Shell Make your selection and press enter (In my case I chose GitBash).If you’re using Visual Studio Code then type this command in terminal.
Set-ExecutionPolicy -Scope CurrentUser -ExecutionPolicy Unrestricted
- Now the commands will also run on VS code Terminal.
Still facing some issue
Follow the troubleshooting page for some tips